It’s often a problem to manage local server for web development. One of the useful solutions is to use some kind of virtualization software like VirtualBox, Vagrant etc, but it can be tricky to resolve all configuration questions. I prefer to use PuPHPet online GUI configuration tool to generate Vagrant configuration file. I’ll tell you how to connect this environment to the PHPStorm IDE with Xdebug debugger. You should have VirtualBox and Vagrant already installed.
First, go to the https://puphpet.com/ website.
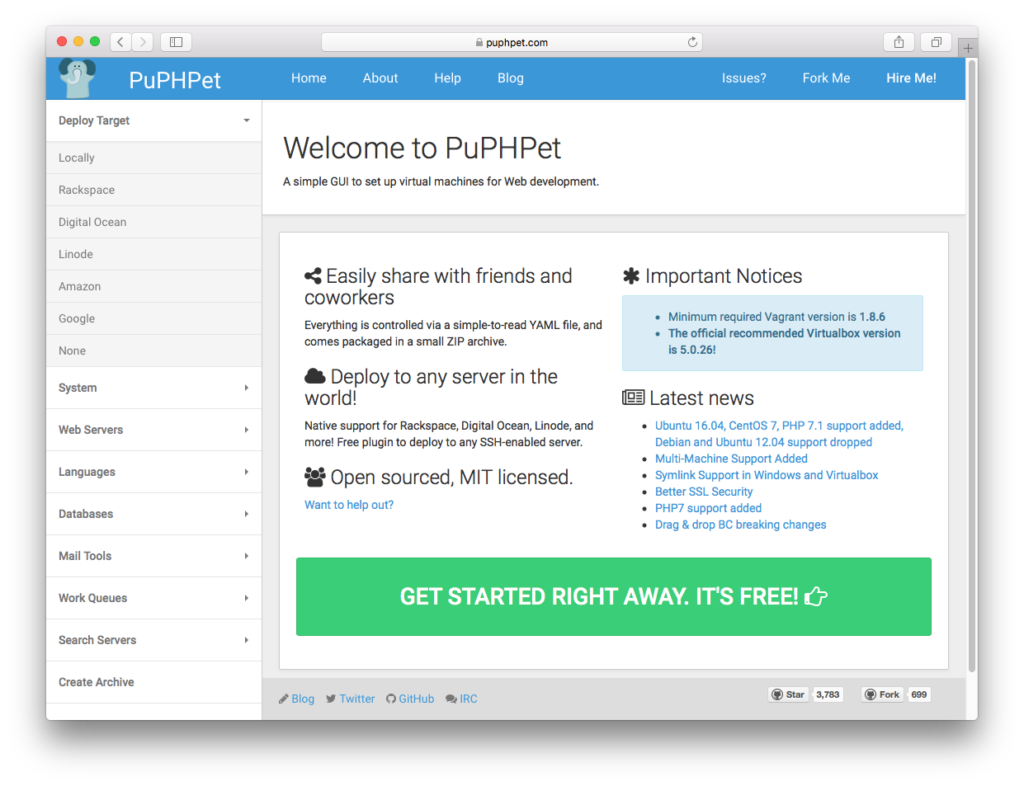
I recommend to set minimum 1024MB of RAM and 2 virtual cores to the new virtual machine.
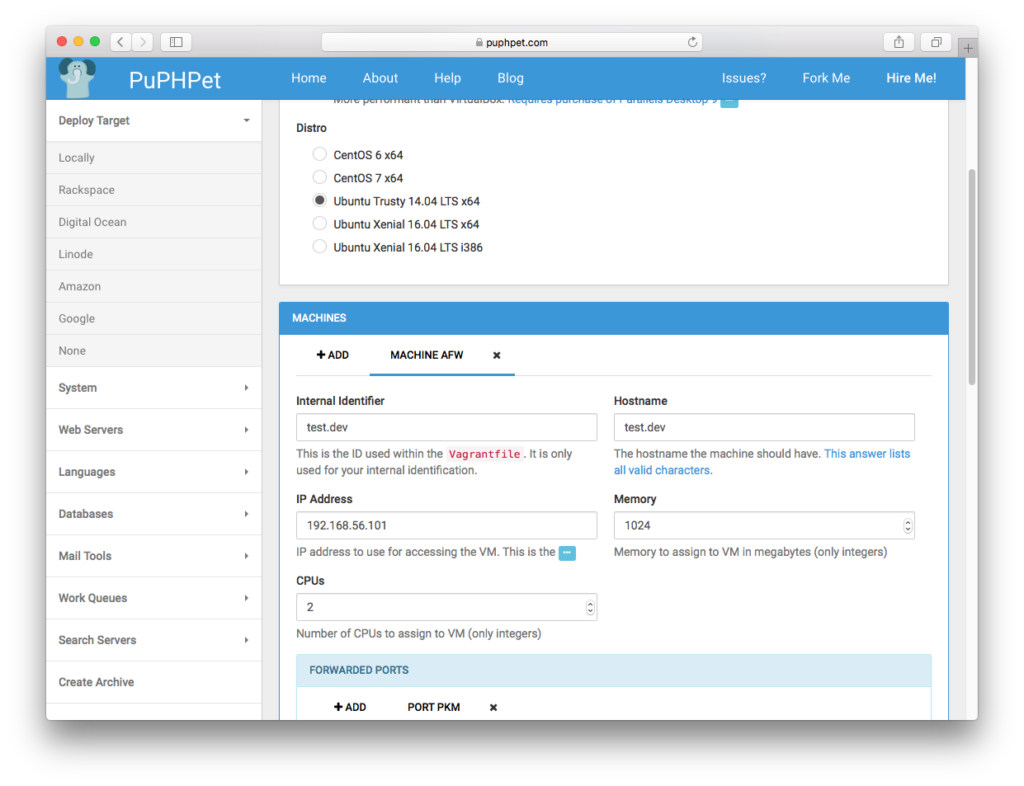
Then, it’ll be better to add mc package (console file manager) to the default installation set.
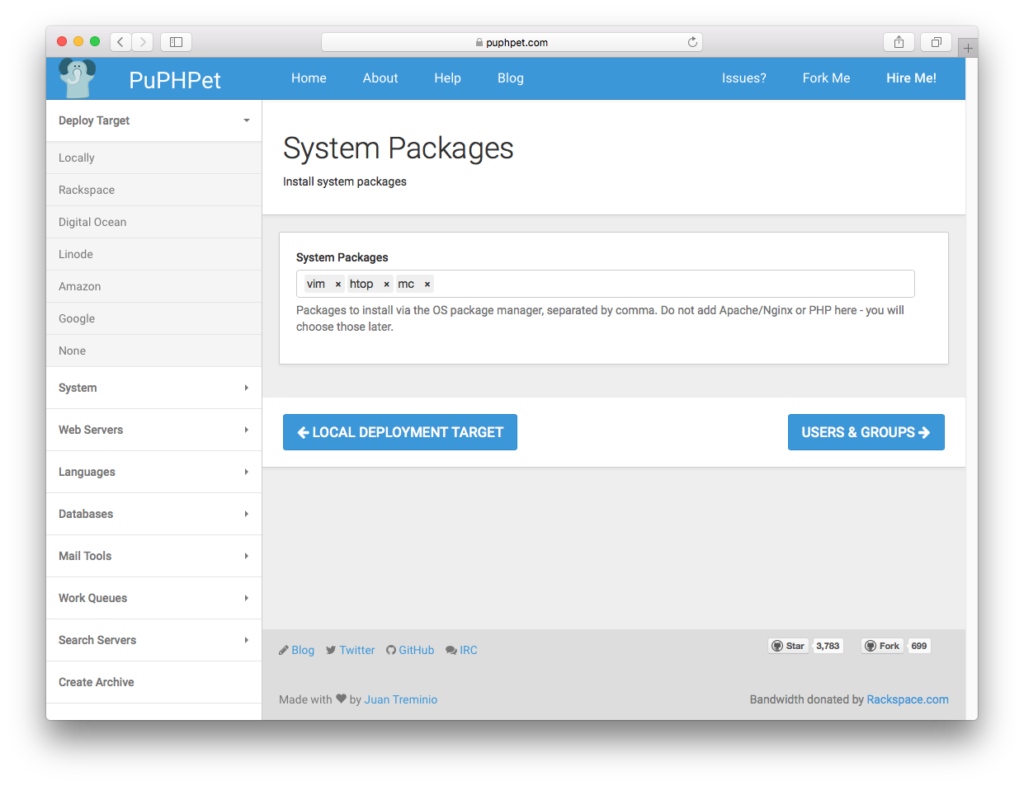
Then, configure virtual hosts like described below.
On the PHP configuration options you should click on “Install Xdebug” and select next options:
xdebug.remote_enable = 1
xdebug.remote_handler = dbgp
xdebug.remote_port = 9000
xdebug.remote_autostart = 1 (this option allows you to ignore xdebug cookies)
xdebug.remote_host = 192.168.56.1 (your host IP in the local virtual network)
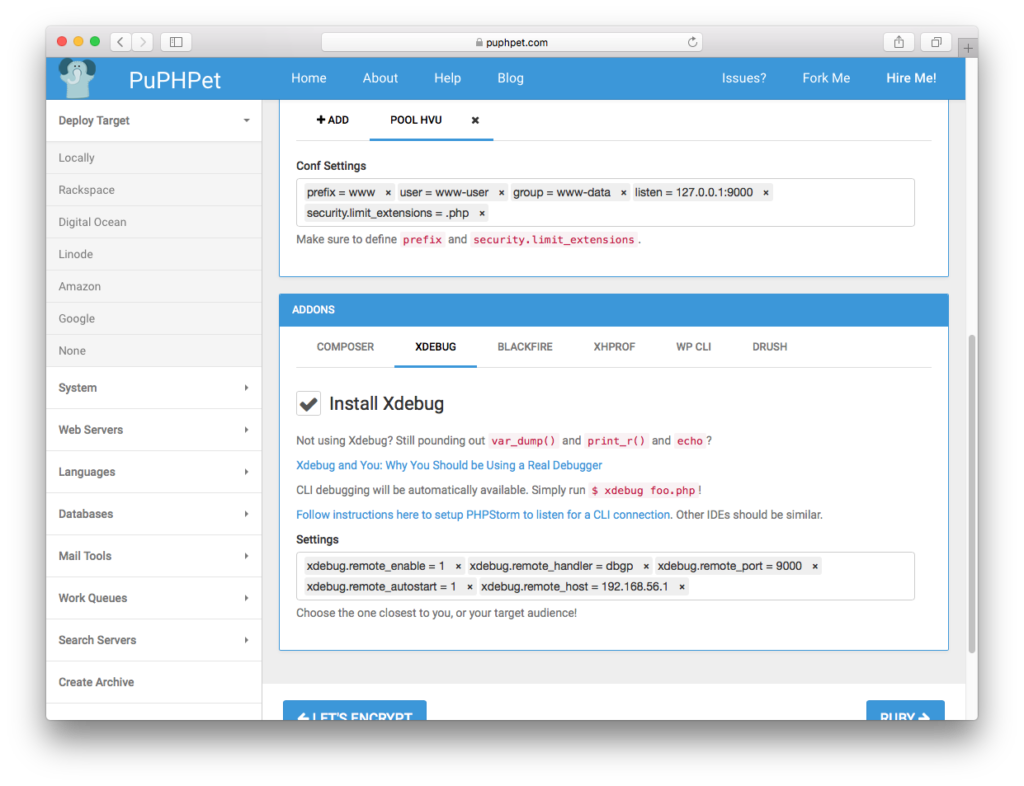
All other options you can leave by default and install any other packages like MySQL.
The next step is to generate and download archive with configuration files, then unzip it to your project’s folder.
Now you should edit your hosts file (/etc/hosts on Linux, /private/etc/hosts on Mac and c:\windows\system32\drivers\etc\hosts on Windows), add some IP mappings to it like
192.168.56.101 test.dev
Then you should open your terminal in this folder and execute “vagrant up” command. This process will take some time and your local site will be available at http://test.dev.
So, when your virtual machine is up and running, it’s time to manage PHPStorm settings.
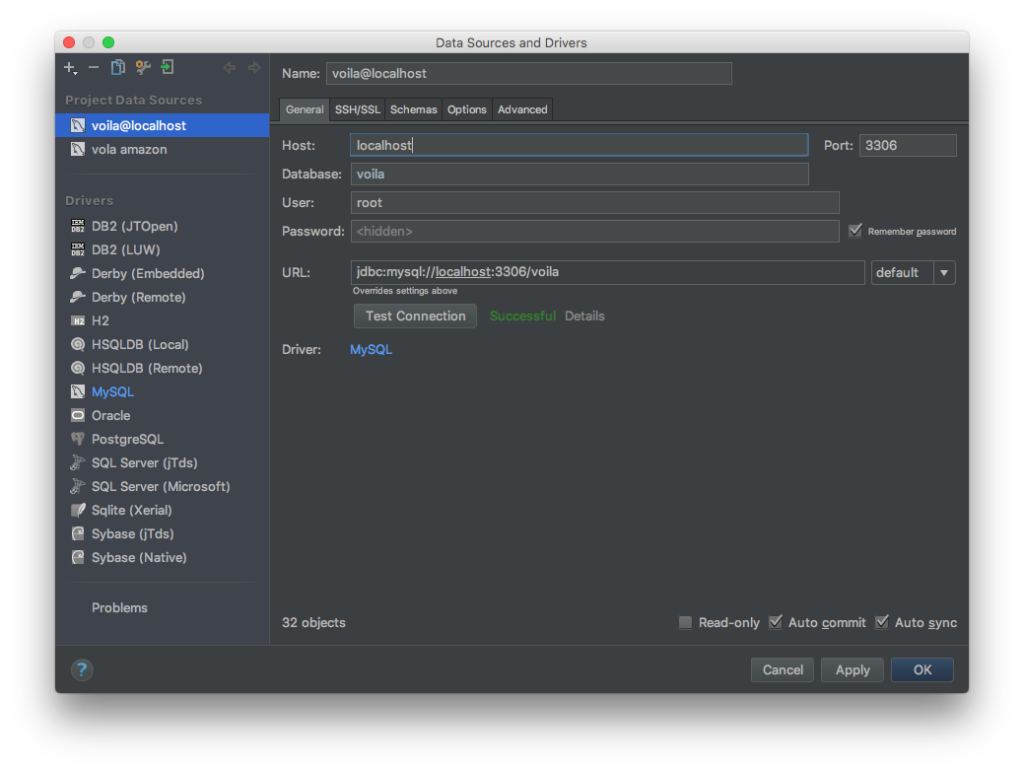
Go to the View -> Tool Windows -> Database and click + -> Data Source -> MySQL and fill options like described below.
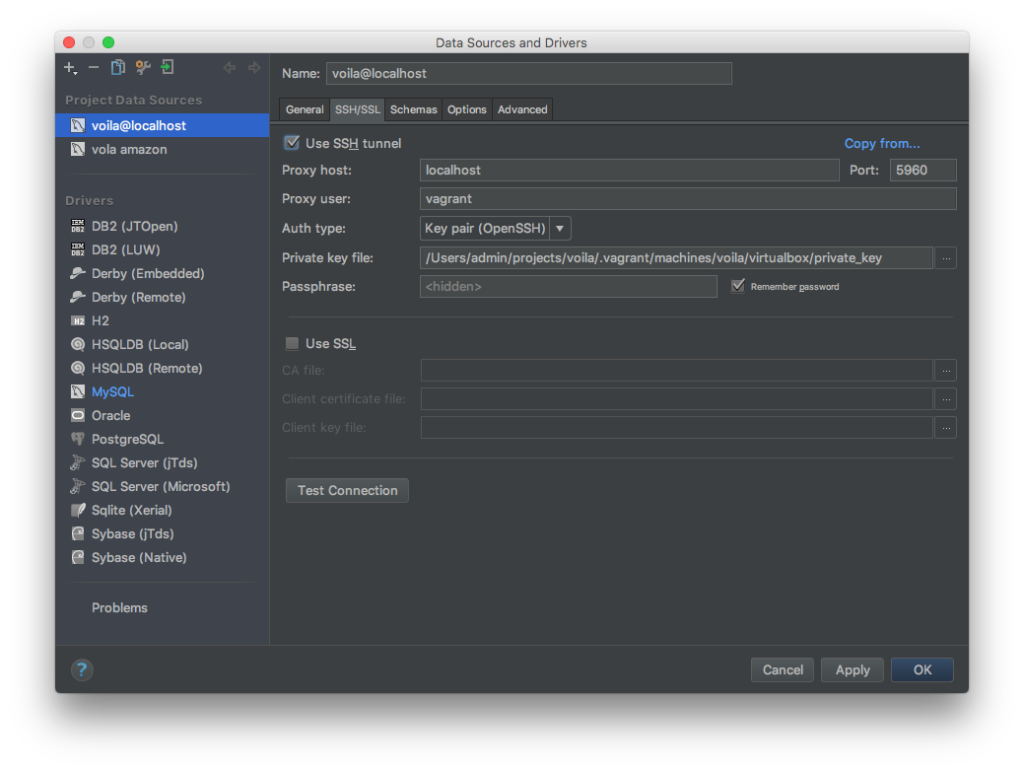
Then you can put some breakpoints on your code and click on Run -> Start listening for PHP Debug connections. Your environment is ready now. Happy coding!


